Making yogurt at home is often the healthiest and cheapest option – and much easier than you might think. Many store-bought yogurts are higher in sugar and lower in probiotics than your homemade version. In your own kitchen, you can better control and prolong the ferment time to increase the healthy bacteria levels in your yogurt. Luckily, making yogurt at home is a basic, no fuss process and anyone can do it. Here’s a step-by-step guide to how you can perfect your homemade yogurt.
Choose your Milk
The best milk for making yogurt at home will be whole fat, organic and not Ultra High-Temperature Pasteurized, (UHT). You want whole fat milk for your yogurt batch because it will give the finished product a thick, creamy texture. You can make your yogurt with two percent milk, but your yogurt will have a thinner finish. While that can work well for yogurt drinks or recipes, it won’t have that nice texture when you eat it from a bowl. Avoid any milk that has been treated for lactose as it is not good for culturing when you make yogurt. .
Grass-fed dairy will be best for texture and taste. If organic is not an option for you, get the best milk you can. Sheep’s milk and goat’s milk can also be used to make yogurt, though the results will vary. Alternative milk such as coconut milk is also possible, though the process is a bit different.
Pasteurized milk is cooked at 145-212 °F (63-100 °C) for varying lengths of time, then cooled to 39 °F (4°C) for storage. This process makes it great for culturing your craft yogurt.
Raw milk is another good option for making craft yogurt. You will want to use double the starter (see below) and make sure to keep the temperature as consistent as possible. An electric yogurt maker is a good option here, if you choose to use raw milk for your craft yogurt.
Get a Great Starter
You need a great starter for making yogurt at home. The yogurt starter needs the bacteria called Lactobacillus Acidophilus, the organisms that makes milk sour and thick. You can find commercial yogurts with the Live and Active Cultures seal on the side. The seal means that there are 100 million cultures per gram, perfect for starting a new round of yogurt, including more healthy bacteria like Lactobacillus bulgaricus and Streptococcus thermophilus,
There are also powdered yogurt starters, keffir grains, and heirloom starters. Choose a starter that works best for your craft yogurt and then you are ready to start culturing. After you have your own batch, you won’t have to purchase any more starters – you can use some of your finished yogurt for future batches. You can also experiment with cultures that make different types of yogurt.
Make Your Yogurt
Before you do anything, clean and sterilize your work area as well as your yogurt-making equipment. You can use boiled water as well as your dishwasher to make sure everything is ready and free of germs. Then, prepare an ice bath in a large bowl and place it on a nearby counter or table. A sink filled with ice will also work. You are now ready to make yogurt.
- Use a large, heavyweight dutch oven to heat half a gallon of milk to 180°F (82°C). This works best if you attach a candy thermometer to the side. Stir your milk occasionally to make sure no skin forms and it doesn’t boil over. Once you have the right temperature, you need to add your starter.
- Scoop out a cup of milk and add your starter to the smaller amount. Stir them together, then pour the mixture back into the dutch oven. Cover it and place it in a (turned off) oven with the light on or into a yogurt maker. You want to keep your mixture warm for twenty four hours. A long fermentation will result in higher amounts of acidophilus and improve your gut health. The level of lactose in your yogurt will also get much lower, making it good for any sensitive eaters.
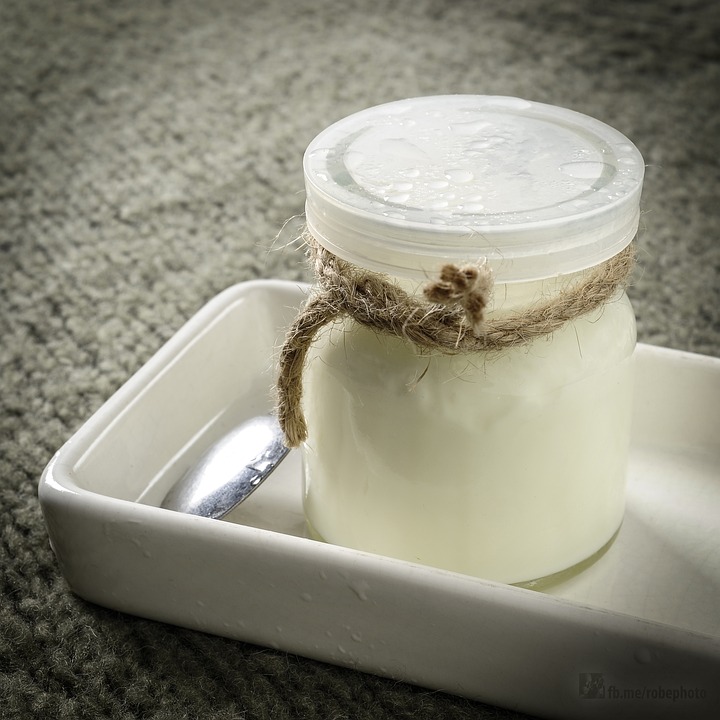
- When you have the consistency you want, take your yogurt out and store it in jars or well sealed containers. Be sure to save a small amount as your starter for your next batch. You can keep it alive by feeding it one or two tablespoons of milk per week.
4 Easy Steps:
- Choose the best milk possible – look for grass-fed, raw, local, organic
- Get a good starter – ask friends, check for a Live and Active Cultures seal
- Ferment – Twenty four hours is ideal for the most active, beneficial bacteria
- Save it – Put some yogurt aside for future use and enjoy the rich, delicious taste it gives your homemade creations

